{%!b(MISSING)lock %!}(MISSING)タグを使ってDjangoでHTMLテンプレートを利用する

ヘッダーやフッター部など、共通で使用するパーツを雛形として用意してみます。
変更が必要になった場合も、全てのページを変更する必要がなくなるので手間が減ります。
WordPressやRailsでも必ず使われる技ですね。
Table of Contents
ディレクトリ構造の確認
次のような構成のプロジェクトで話を進めます。
.
├── hello # <- プロジェクト側のディレクトリ
│   ├── __init__.py
│   ├── __pycache__
│   ├── settings.py
│   ├── urls.py
│   └── wsgi.py
├── hello_app # <- アプリケーション側のディレクトリ
│   ├── __init__.py
│   ├── __pycache__
│   ├── admin.py
│   ├── apps.py
│   ├── migrations
│   ├── models.py
│   ├── templates # <- テンプレート置き場
│   ├── tests.py
│   ├── urls.py
│   └── views.py
└── manage.py
プロジェクトとアプリケーションの作り方はこちらの記事をどうぞ↓
https://hodalog.com/how-to-start-python-django/
前準備
まずアプリケーションの登録とテンプレート置き場を用意します。
アプリケーションの登録
Djangoでテンプレート機能を使うには、まずアプリケーションの登録をする必要があります。
settings.pyにある INSTALLED_APPS という環境変数に設定を追記します。
INSTALLED_APPS = [
    'django.contrib.admin',
    'django.contrib.auth',
    'django.contrib.contenttypes',
    'django.contrib.sessions',
    'django.contrib.messages',
    'django.contrib.staticfiles',
    'hello_app', # <- 追記した行。アプリケーションのディレクトリ名と揃える。
]
テンプレート置き場の作成
Djangoでは、アプリケーションごとに templates というディレクトリを作成し、そこにテンプレートファイルをおきます。
hello_app/
├── __init__.py
~
├── templates # <- これを作る
│   └── hello # <- これも必要
│       └── index.html
├── tests.py
├── urls.py
└── views.py
index.htmlの作成
取り急ぎ次のような中身のindex.htmlにします。
<!DOCTYPE html>
<html lang="en" dir="ltr">
  <head>
    <meta charset="utf-8">
    <title></title>
  </head>
  <body>
    <h1>Hi Djnago!!</h1>
    <p>This is my 1st Django app.</p>
  </body>
</html>
パスを通す
☆がついているファイルを設定してパスを通します。
.
├── hello # <- プロジェクト側のディレクトリ
│   ├── __init__.py
│   ├── __pycache__
│   ├── settings.py
│   ├── urls.py # <- ☆
│   └── wsgi.py
├── hello_app # <- アプリケーション側のディレクトリ
│   ├── __init__.py
│   ├── __pycache__
│   ├── admin.py
│   ├── apps.py
│   ├── migrations
│   ├── models.py
│   ├── templates
│   ├── tests.py
│   ├── urls.py # <- ☆
│   └── views.py # <- ☆
└── manage.py
プロジェクト側のurls.pyの設定
プロジェクト側のurls.pyを次のようにします。
from django.contrib import admin
from django.urls import path, include

urlpatterns = [
    path('admin/', admin.site.urls),
    path('hello/', include('hello_app.urls')),
]
アプリケーション側のurls.pyの設定
アプリケーション側のディレクトリにある urls.py のパスを次のようにします。ない場合は作ります。
from django.urls import path
from . import views

urlpatterns = [
    path('', views.index, name='index'),
]
views.pyの設定
urls.pyで指定したパスでviews.pyのindex関数が呼ばれ、戻り値に指定したrender関数でテンプレートが描写されます。
from django.shortcuts import render
from django.http import HttpResponse

def index(request):
    return render(request, 'hello/index.html') # <- templates配下の"hello"ディレクトリにあるindex.htmlファイルを指定
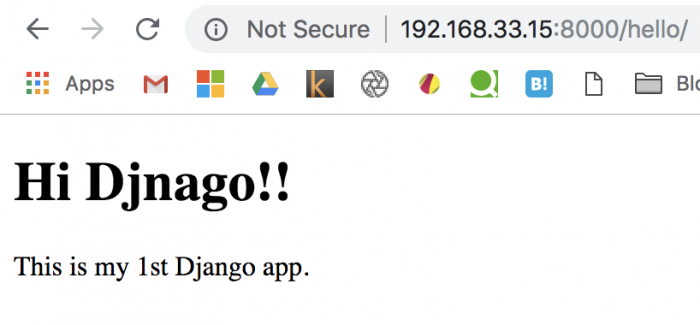
この段階でサーバーを起動し、ブラウザからアクセスすると↓こんな感じになる。

レイアウト用のテンプレート作成
ヘッダーとフッター部分をlayout.htmlという雛形として用意し、その雛形をindex.htmlへ継承させてみます。
templates
└── hello
    ├── index.html # <- コンテンツ
    └── layout.html # <- 雛形
layout.htmlとindex.htmlをそれぞれ次のようにしました。
# layout.html

<!DOCTYPE html>
<html>
  <head>
    <meta charset="utf-8">
    <meta name="viewport" content="width=device-width, initial-scale=1">
    <title>Hello Bulma!</title>
    <link rel="stylesheet" href="https://cdnjs.cloudflare.com/ajax/libs/bulma/0.7.1/css/bulma.min.css">
    <script defer src="https://use.fontawesome.com/releases/v5.1.0/js/all.js"></script>
  </head>
  <body>
  <section class="section">
    <div class="container">
      {%!b(MISSING)lock content %!}(MISSING)
      {%!e(MISSING)ndblock %!}(MISSING)
    </div>
  </section>
  </body>
</html>
# index.html

{%!e(MISSING)xtends 'hello/layout.html' %!}(MISSING)

{%!b(MISSING)lock content %!}(MISSING)
<h1 class="title">
  Hi Django!
</h1>
<p class="subtitle">
  This is my 1st Django app.
</p>
{%!e(MISSING)ndblock %!}(MISSING)
継承元となるlayout.htmlにブロック{%!b(MISSING)lock %!}(MISSING){%!e(MISSING)ndblock %!}(MISSING)を用意し、その中身を継承先のindex.htmlに書きます。
すると二つのページが合体して出力されます。
まとめ
テンプレートの扱い方はRailsやWordPressよりもクセが強い感じですが、とりあえずできました。やったね!